
An Introduction to Scuttlebutt Development: Your Test Playground
Background
Since you’re here, I’m going to assume that you know what Scuttlebutt is and that you’re interested in developing using it. If this is not the case, today’s your lucky day! I recommend Andre Staltz’s blog posts as a good place to wet your appetite.
Today, we will walk through how to setup a Scuttlebutt test network in your local environment. A test network is a very useful tool for learning and experimenting with reckless abandon as you needn’t worry about breaking things. If anything goes wrong in your little playground you can just blow it all up and start over, no harm no foul. In contrast to this, if you are experimenting on the main network and and gossiping all those messages to your peers, if anything goes awry there’s a chance of it being sent to your peers as well; not to mention the fact that others may not be interested in seeing all of your test messages all the time. All this to say, if you’re going to be developing for Scuttlebutt I would recommend devising a way to not gossip around your test messages. The following post is how I have gone about doing that after some discussion with others on Scuttlebutt.
Dependencies
We’re going to walk through the install of Scuttlebot (sbot), which is documented more concisely here. You will need node v4 or greater (you might want to use nvm) and node-gyp (npm install -g node-gyp).
If you’re on Linux, installation may fail when building the libsodium dependencies due to missing aclocal. On Ubuntu you can install them by running the following:
sudo apt-get install autotools-dev automake m4 libtool eclipse-cdt-autotoolsOn MacOS you may need the following packages installed, which you can install via Homebrew:
brew install libtool automake autoconfNow you can install sbot:
npm install -g scuttlebotTo test whether sbot installed correctly run start Scuttlebot as a server by running:
sbot serverOnce that is running, open a second shell session and use the sbot CLI access the API. Try the following commands:
sbot whoami
sbot publish --type post --text "Hello World"
sbot createLogStream
Setting Up A Local Testnet
Whether you just installed sbot now or you already had it installed, you probably ran sbot server to see if it was installed correctly. When you run sbot server for the first time, sbot creates a folder in your home directory called .ssb. This is where sbot stores all the messages, indexes, blobs and more.
Scuttlebot Configuration
When you install sbot it comes with a bunch of pre-configured configured network settings. You can check out all the default settings here. We’re just going to focus on a few right now.
The first setting we will look at is name. As you can see if the link above, the default network name is 'ssb', as in your .ssb folder. If this name were to be changed to 'mysuperawesomenetwork', sbot would look for all the Scuttlebutt files in ~/.mysuperawesomenetwork.
The second setting(s) we will look at are the port settings, both port and ws.port. These determine which ports sbot runs on, and if you change them it will use different ports (shocking I know).
The last setting we will look at is caps. caps is probably the most important setting, since it holds the network keys. These keys determine which network your sbot is on. @cel explains this better and more succinctly than I could so I will borrow his words.
Setting caps.shs makes gossip connections not occur with peers that have a different shs key.
Setting caps.sign makes messages to be considered invalid that were created with a different sign key.
If you only set the shs key, messages could leak out of your network if someone in the network changes their shs key, or adds messages manually. Setting the sign key ensures that the messages will not be able to be published (or validated) on the main ssb network, only on a network where that same sign key is used.
The caps.shs key that sbot comes pre-configured with is the key of the “main network”. It is the key that all the packaged Scuttlebutt clients use and unless you know what you’re doing you probably shouldn’t change. So naturally, that’s what we’re going to do next!
When learning and developing with Scuttlebutt you probably don’t want to be publishing and gossiping all your test messages around the network. Mostly, it’s just a little embarassing having everyone see your messages live as you learn. Your testnet is your local development environment, your playground.
To make our local testnet, we’re going to need to give our sbot a place store it, and this is where that name field comes in. Create a new folder in your home directory called .ssb-test (or .anythingyourwantreally). Inside .ssb-test we’re going to make a file called config.
Open up a node REPL and generate new shs and sign keys with crypto.randomBytes(32).toString('base64'). We want a new shs key so that our testnet messages won’t be gossiped to the main network and we want a new sign key so that our testnet messages can’t be gossiped onto the main network.
Copy this into the config file you made, filling in your keys where specified.
{
  "caps": {
    "shs": "your shs key here",
    "sign": "your sign key here"
  },
  "port": 8007,
  "ws": {
    "port": 8988
  },
  "ssb_appname": "ssb-test"
}
We specify ports 8007 and 8988 so that our testnet can run in parallel with another sbot on the main network and we specify ssb_appname to be the name you gave your network. You will notice that most of the config settings aren’t mentioned here and that’s because for the rest the defaults are used, we only need to specify settings we want changed.
Once you save your config you’re almost ready to go, you just need to tell sbot which network you want to run on. To do that, you need to set the environment variable ssb_appname, this is what sbot looks for. So run export ssb_appname="ssb-test" and we’re good to go. (Note: you may want to also add this command to your .bash_profile if you don’t want to run it in every bash session you want to access your testnet in.)
Getting Your Testnet Up and Running
You can now run sbot with sbot server and it will be running your testnet! The ssb_appname environment variable will tell sbot where to look for the network files and there it will find your config file. Now open up another bash shell (ensuring ssb_appnameis set) and try out your testnet by running some of the sbot CLI commands again:
sbot whoami
sbot publish --type post --text "Hello World"
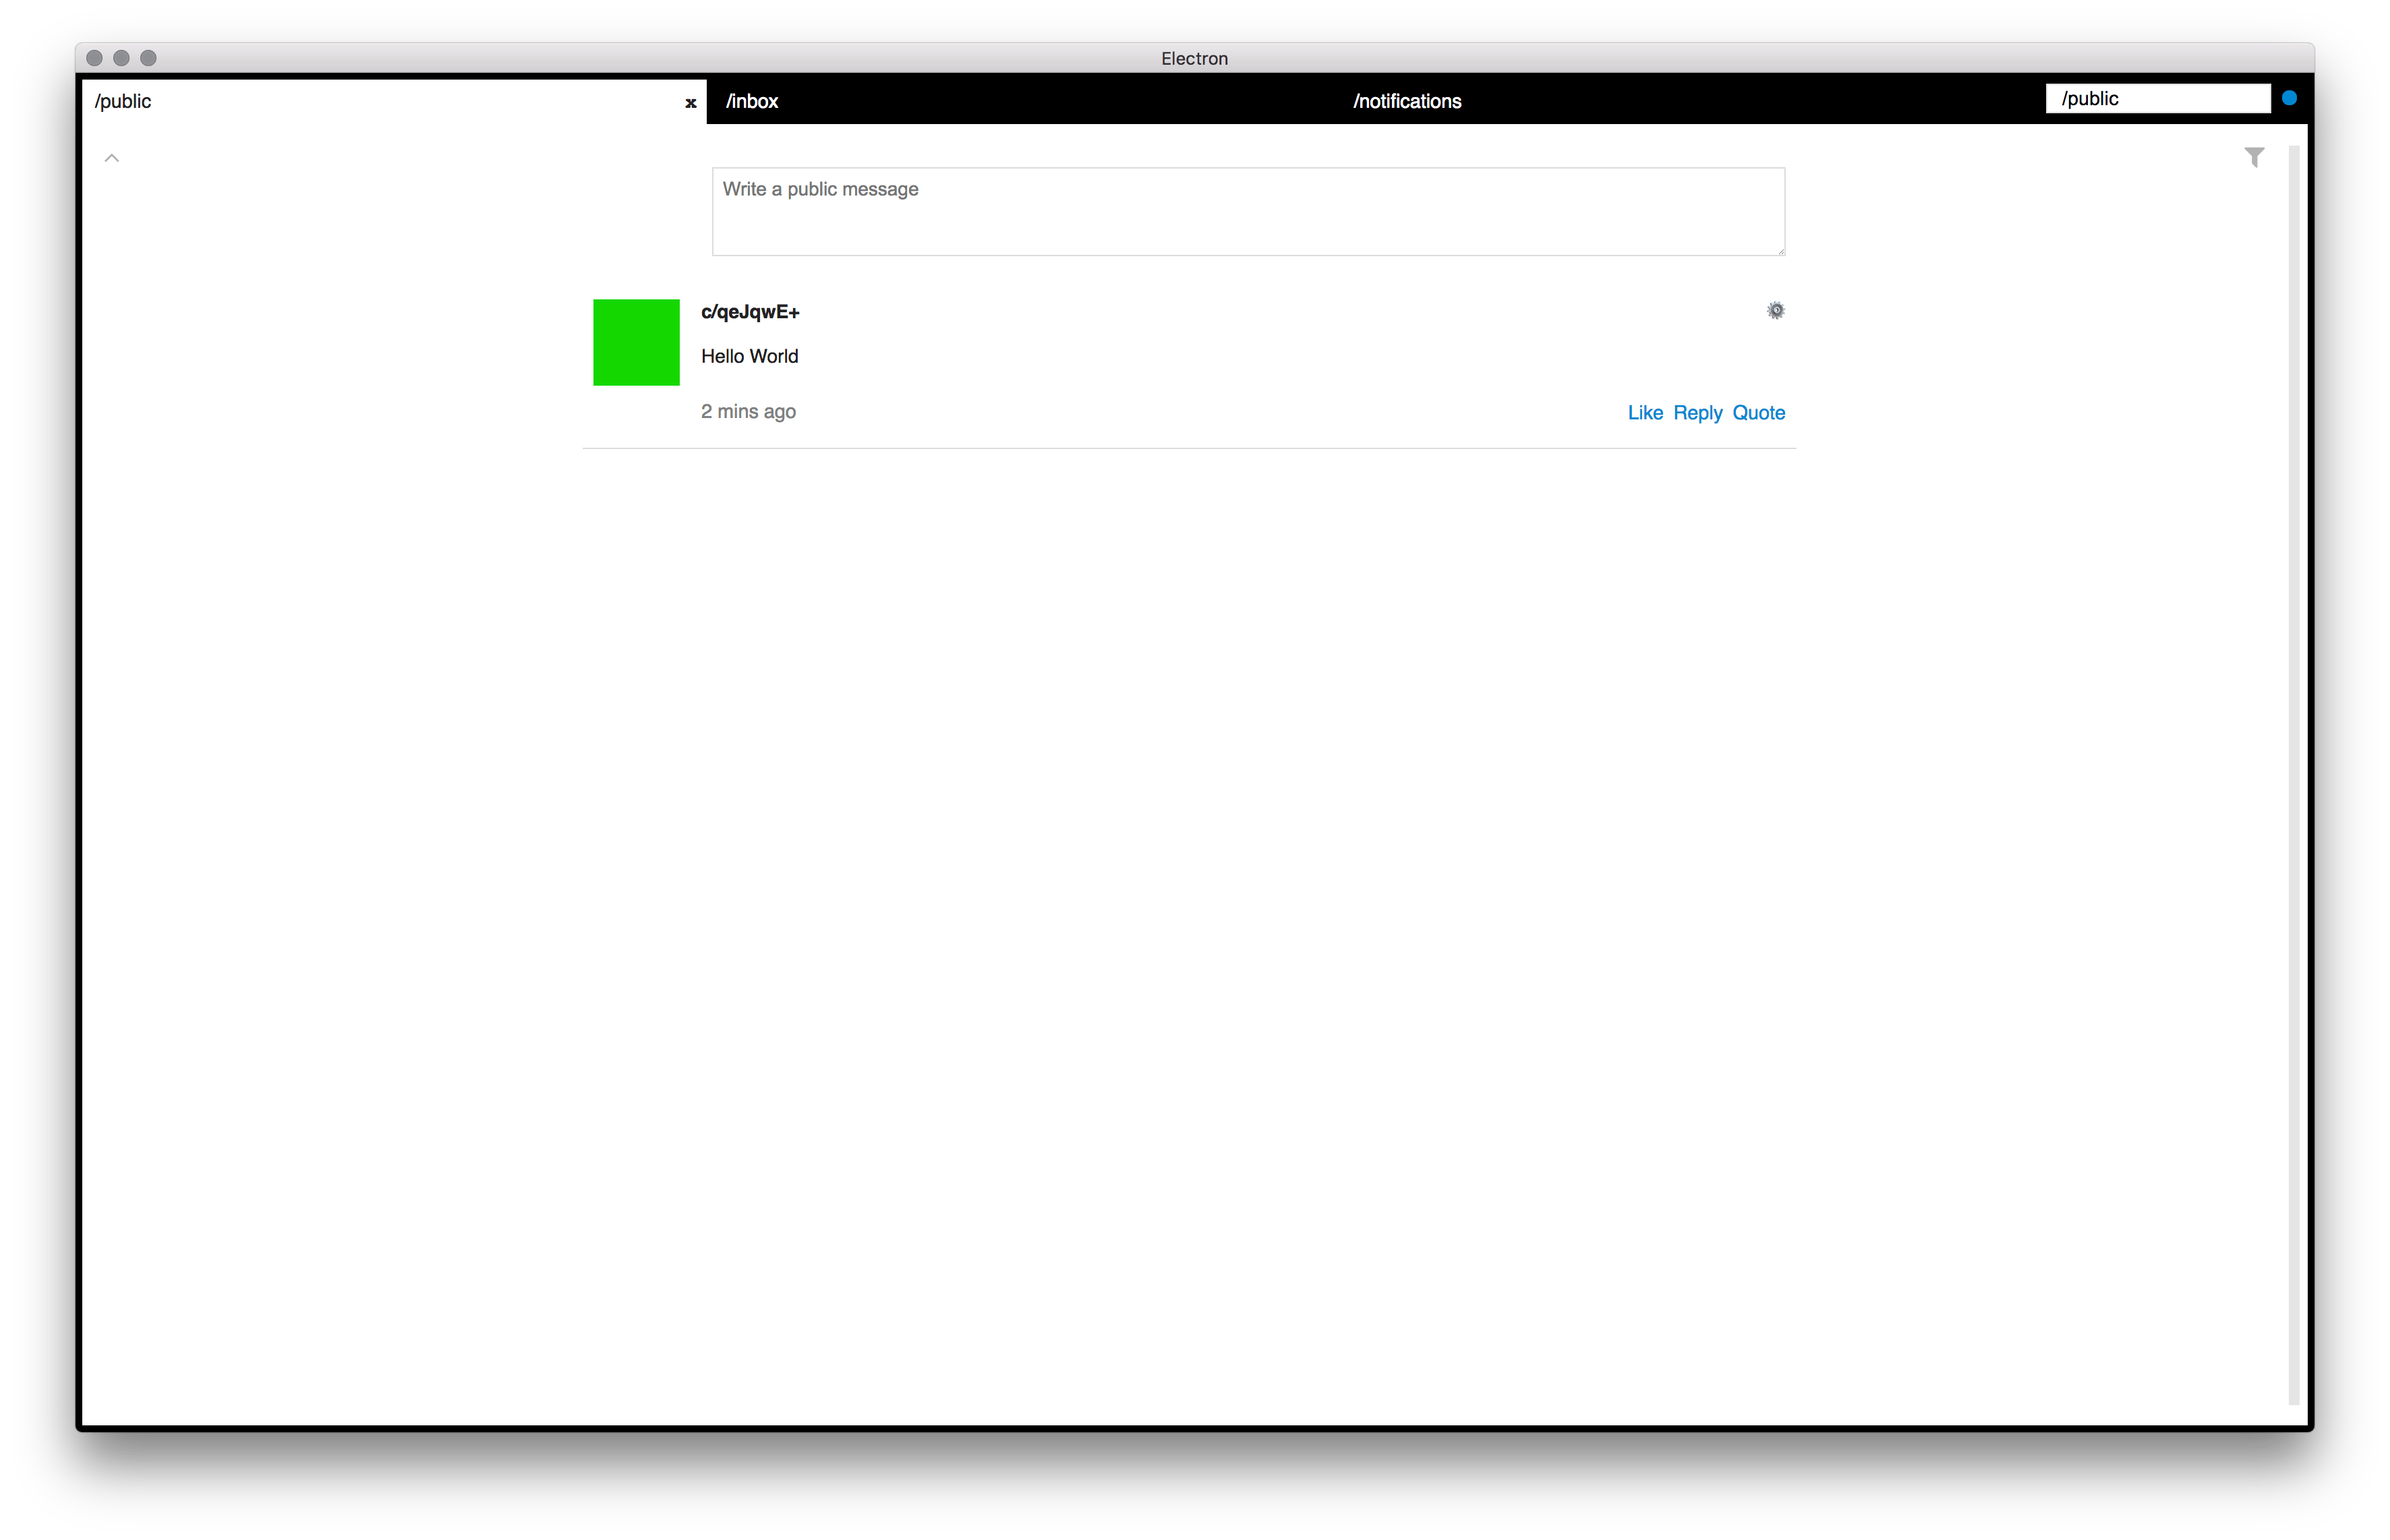
sbot createLogStreamCongratulations, you’ve just shared your first message on your testnet! You will notice that when you ran sbot whoami you have a different identity from when you initially setup sbot. This is because you are now on a different network (your testnet) and so sbot created an identity for this network. Naturally, none of the messages you shared in the other network will appear here either, so the post you published will be the only message to show up in the log.
Scuttlebot Plugins
Your sbot is now setup, woohoo! This however, is just a barebones sbot with the default plugins installed, such as ssb-friends which handles the logic of whose feeds you will replicate. There are few other plugins that are used by some of the popular Scuttlebutt clients (ie. Patchbay and Patchwork) which add some helpful functionality. To install these plugins, run the following commands in your second shell:
sbot plugins.install ssb-about
sbot plugins.install ssb-backlinks
sbot plugins.install ssb-fulltext
sbot plugins.install ssb-private
Once these plugins are installed, kill the sbot server that you have running and restart it. One thing to note is that these plugins are installed in .ssb-test/node_modules. This means that the plugins are installed per network and need to be installed again if you create another network.
While you can use your sbot just through the CLI, I wouldn’t recommend that as your primary interface into Scuttlebutt. And now that you’ve installed a few plugins your testnet is now ready for a graphical client like Patchbay, so let’s see if we can get that running!
Graphical Client
We will install Patchbay with git so that we have access to the source code to make changes as needed:
git clone git@github.com/ssbc/patchbay.git
cd patchbay
npm install
npm run rebuild
Patchbay actually uses the ssb-config we were looking at previously to determine how it connects to an sbot, so in order to get Patchbay to connect to your testnet you will need to make changes to ssb-config. Clone it now:
git clone git@github.com:ssbc/ssb-config.gitNext open up inject.js and modify it to match the settings you specifed in your testnet config previously. Once you have saved those changes we’re going to need to make Patchbay look at this ssb-config. In ssb-config run:
npm linkThis is make your ssb-config available to other repos on your machine via npm. Next, navigate back to Patchbay and run:
npm link ssb-configThis tells Patchbay to look at your local ssb-config rather than the one published to npm. Assuming your testnet sbot is still running, you can now start Patchbay by running (you may need to set the enviroment variable ssb_appname in this session as well):
npm run devThis will open an electron window with Patchbay in it and you should see the message that you posted earlier!
What’s Next
You now have a playground setup for all your scuttle experiments. Next, I will dig into a basic plugin for sbot and what it is useful for. Then, I will take a closer look at Patchbay and how you can build user interfaces for Scuttlebutt.
You can make sure that the author wrote this post by copy-pasting this signature into this Keybase page.